|
1951 Chevy Accessories Installation Manual |
|||
|
steering
post and adjust up or down until switch lever turns easily to "on" position
while rubber roller is under
slight compression as
shown in figure 180. |
same
terminals on junction blocks from which others were removed. Connect other
wires to those brought forward
from turn signal switch with
connectors furnished in |
||
|
|
|||
 |
|||
|
|
|||
|
Figure 182 |
|||
|
|
|||
|
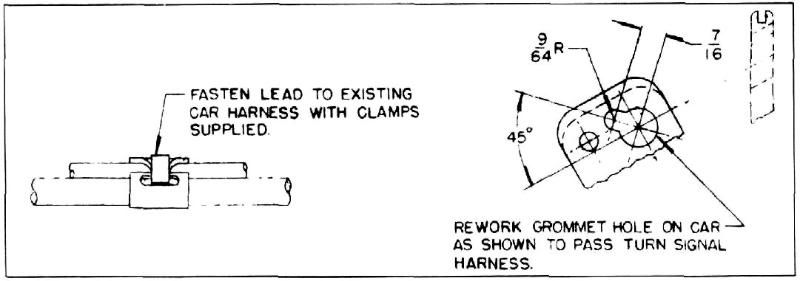
2. Remove car wiring
harness grommet and rework as shown
in figure 182 using a round file or other satisfactory tool.
Replace grommet with turn signal
wiring harness in-therein.
3. Pass harness along left side of motor
compartment to radiator, securing to existing car harness with clamps supplied, as shown
in figure 182. The longer of
the two wires from turn signal
should be carried across for the right-hand parking lamp, attaching
with clips to the radiator tie bar,
(see figure 187).
4. Remove parking
lamp bulbs, sockets and wires, and replace with those furnished in package
as shown in figure 183. Connect new parking lamp wires with spade terminal
to |
package.
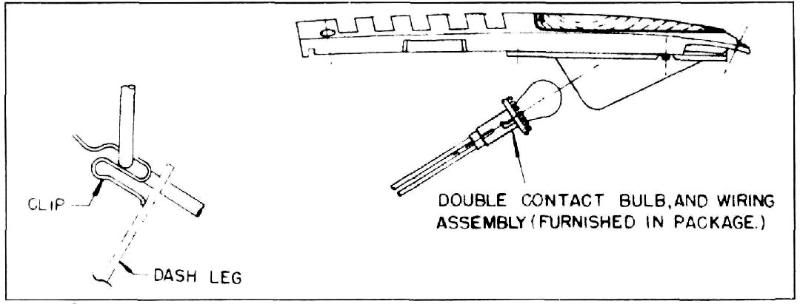
5. Install clip on dash leg as shown in figure
183. Run long wire from turn
signal down under floor of car
and along frame on left side of
car using 6 spring clips furnished in package, locate rubber plug in luggage
compartment floor behind
composition wall at left side
of compartment. Remove this plug and replace with grommet supplied in
package. Run the wire through
this grommet and connect
to left-hand stop lamp as shown in figure 184.
6. Disassemble natural with black and green
cross tracer wire from
connector {located in upper
left corner back of instrument panel). Connect natural wire from turn
signal |
||
|
|
|||
 |
|||
|
|
|||
|
Figure 183 |
|||
|
|
|||
|
75 |
|||
|
|
|||
| « PREVIOUS PAGE | CONTENTS PAGE | NEXT PAGE » |
|
|