|
1951 Chevy Accessories Installation Manual |
|||
|
punch location for the two
Bracket holes and drill through with
No. 29 or 9/64" drill. DO NOT TAP HOLES
Reassembling Handle Unit To
Shaft
10. Be sure to turn Switch to "OFF" position
(see figure 169). This must be
done to avoid damage to Switch
contact.
11. Slide Housing "E" into position on Shaft. DO
NOT FORCE ASSEMBLY, as force may bend or damage driving
Racks. |
12. Start Screw "A" into Housing "E." DO NOT
TIGHTEN. Screw should be in
approximate center of locating
groove in bottom of Shaft.
13. Insert Pinion "D" between teeth of driving
Racks in Housing "E." BE SURE that Pinion is started into center of hole in Housing
"E." Pinion should slip into
place easily under very light
finger pressure. If more than
light finger pressure is required, Pinion is not assembled into center of hole
(see figure
168). |
||
|
|
|||
 |
|||
|
|
|||
|
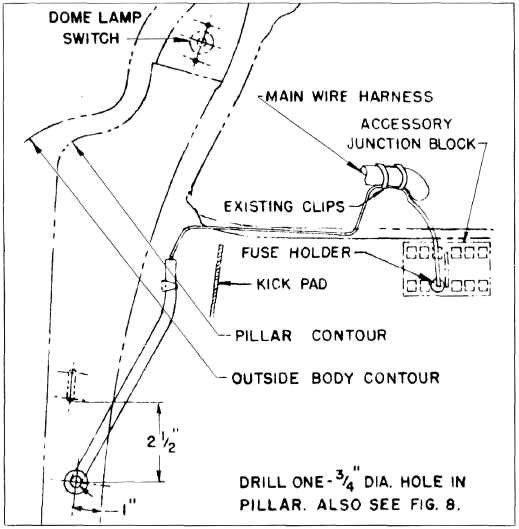
Figure 172 |
|||
|
|
|||
|
71 |
|||
|
|
|||
| « PREVIOUS PAGE | CONTENTS PAGE | NEXT PAGE » |
|
|