|
1951 Chevy Accessories Installation Manual |
|||
|
986417 STAINLESS STEEL WHEEL DISC
Procedure
for Installation of Wheel Disc on All Model Passenger
Cars. |
 |
||
 |
|||
|
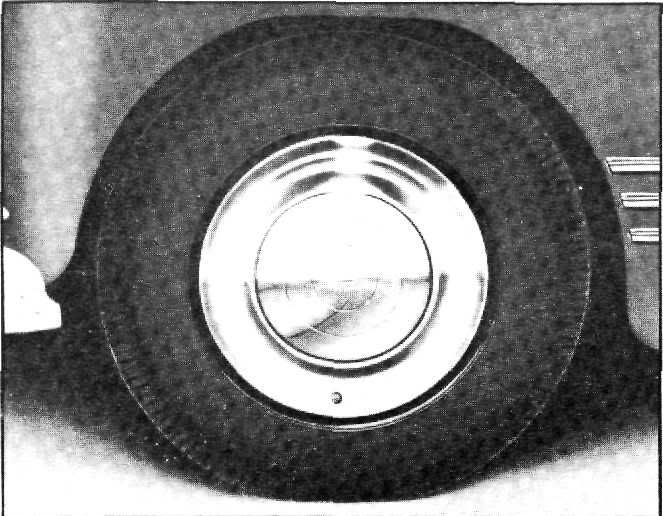
Figure 45
3. Replace hub cap and repeat for
the three remaining
wheels.
Approximate Flat Rate Time .1
of an hour. |
|||
|
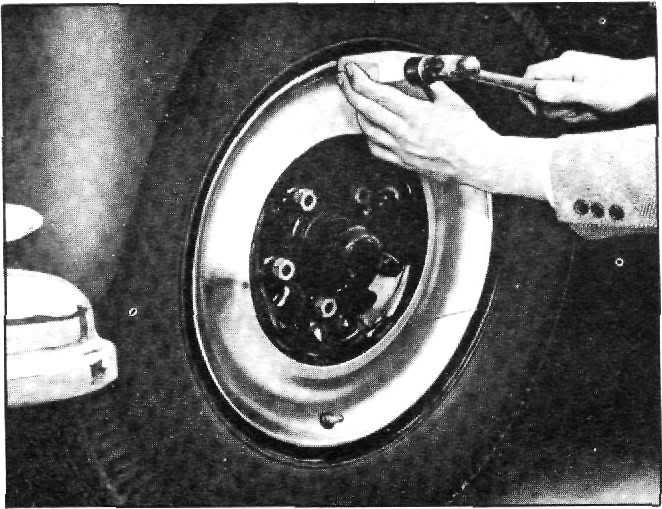
Figure 43
Remove hub
cap. Guide the valve stem through hole
in disc and press firmly into the wheel at this point. Then press opposite
side into the wheel with other
hand applying pressure around
disc in one direction until outer edge is seated within wheel rim as
shown in figure
44. |
|||
 |
|||
 |
|||
|
Figure 46 |
|||
|
986546 TISSUE DISPENSER
Procedure
for Installation of Tissue Dispenser on All Model Passenger
Cars.
1. Remove dispenser cover by pulling outward
on ends of spring clips on
sides of dispenser.
2. Mount center support bracket to dispenser
with two screws, nuts and
lockwashers furnished in
package, making sure nut and lockwashers are on top of bracket on outside of
dispenser, (see figure
47).
3. Remove screw from left-hand side of vent
control rod and mount tissue
dispenser bracket beneath
bracket of vent control rod and replace screw, (see figure
47).
3a. If
vent control rod has been removed use screw furnished and mount bracket in same
location as paragraph 3,
except tissue dispenser
bracket will fit against instrument panel, (see figure
48). |
|||
|
Figure 44
2. The
small wood block which accompanies the
wheel disc should be used in conjunction with a hammer, to gently tap the wheel disc
into its bottom position so
that outer portion of the wheel disc is flush with wheel rim. A light tap with hammer and wood
block is sufficient as shown in
figure 45. |
|||
|
|
|||
|
17 |
|||
|
|
|||
| « PREVIOUS PAGE | CONTENTS PAGE | NEXT PAGE » |
|
|