Headlight Install

Headlamps For STREET RODDER's '47 Chevy Pickup
From the December, 2010 issue of Classic Trucks
By CT Staff
It's been a month since the last installment on STREET RODDER's Project Shop Truck buildup, but the crew over at Hot Rods By Dean in Phoenix has not been resting and progress on Project Shop Truck is going faster than we can get it into the magazine.
This month we're looking at the installation of sealed beam headlamps. Those parts, like many on this project truck, came from Chevs of the 40's. We've been impressed by the amount of products Chevs of the 40's has for '37-54 Chevrolet trucks and cars. If you're restoring or customizing one of these vehicles, sooner or later you'll probably end up talking to these guys.
In this case, they're not restoring or customizing anything. Everything on Project Shop Truck is brand-new stuff. Their Dynacorn-bodied '47 Chevy pickup is being created entirely from easy-to-find aftermarket parts, just because we all wanted to see if it could be done. So far, so good.
Keep reading to see how easy it is to install headlamps on your own restored, modified, or repro parts project truck.
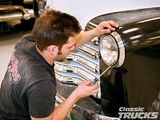
Tony Arme at Hot Rods By Dean finishes the installation of sealed beam headlamps on our Project Shop Truck '47 Chevy. |
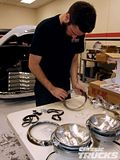
Backtracking a couple hours, here's Jonathan Williams at Hot Rods By Dean arranging the parts from Chevs of the 40's. |
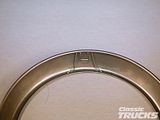
Headlamp Gasket |
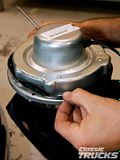
It fit just right, so the gasket was installed on the headlamp housing. |
The gasket was secured into place using eight of these fasteners, called spring-type U-nuts, which hold the screws in place. Dean Livermore at Hot Rods By Dean told us you can find these U-nuts from automotive fastener companies such as Au-ve-co Products (www.auveco.com). |
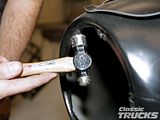
The U-nuts were a tight fit and needed a little persuasion from a hammer to secure them. |
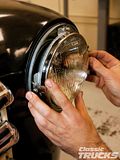
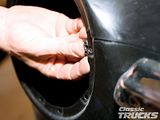
The headlamps are held in the opening by the outer rings fastened in place by their outer tabs. |
This rubber seal was attached to the inside opening of the outer trim ring by four wire retainer springs to provide a snug fit between the bezel and the headlamp. |
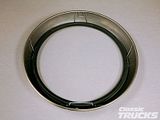
Fitting the retainer springs in the rings takes a little manual dexterity, a little patience, and a little luck, but once they're in, they'll stay in. |
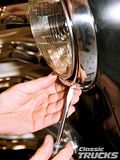
The outer trim ring was mounted with a single screw at the bottom. |
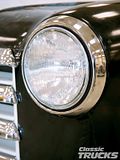
Project Shop Truck now has headlamps. There's nothing to do now except wait for it to get dark. |
|
|